
Unleash Your Inner Artist: Disc Dyeing Basics for Custom Disc Golf Discs – Master the Art of Creative Customization.
If you’re a disc golf enthusiast, you know that not all discs are created equal. Sure, you can buy discs with flashy colors and unique designs, but nothing beats the satisfaction of throwing a disc that you’ve customized yourself.
Enter disc dyeing, the art of adding your personal touch to your discs and taking your disc golf game to a whole new level.
In this blog post, we’ll dive into the world of disc dyeing, covering the basics, the tools you’ll need, and some pro tips to help you unleash your inner artist and create stunning custom discs that will make you the envy of the disc golf course!
Disc Dyeing 101: The Basics
Disc dyeing involves using a variety of techniques to add color to a disc’s surface. This can include using stencils, dipping, shaving cream techniques, and even hand painting.
The possibilities are endless, and the results can be truly mesmerizing. But before you start slinging colors around, there are a few key basics you’ll want to keep in mind:
- Choose the Right Disc: Not all discs are created equal when it comes to dyeing. Discs made from premium plastic materials like Innova’s Star or MVP Neutron plastic tend to take dye better than cheaper plastics. So, be sure to choose a disc made from a plastic that’s compatible with the dyeing process to ensure optimal results. And this handy dandy chart will let you know what discs are dyeable or not.
- Prepare the Disc: Before you start dyeing, you’ll need to prepare the disc by cleaning it thoroughly. Use warm soapy water and a soft cloth or sponge to remove any dirt, grease, or fingerprints from the surface of the disc. Dry it off completely to ensure the dye adheres evenly.
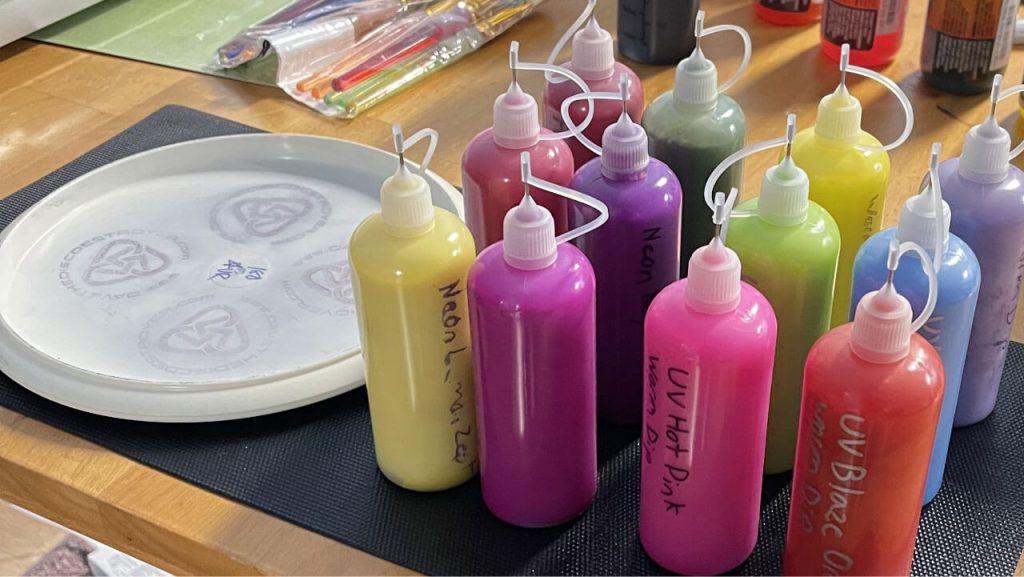
- Gather Your Supplies: To get started with disc dyeing, you’ll need a few basic supplies. This includes dye (either liquid or powder form), plastic squeeze bottles or droppers, plastic wrap or sandwich bags, stencils or shaving cream (if desired), and gloves to protect your hands from dye stains. You can find disc dyeing kits or individual supplies on our store!
- Get Creative: The beauty of disc dyeing is that there are no hard and fast rules when it comes to design. Let your creativity flow and experiment with different colors, patterns, and techniques. Don’t be afraid to try new things and make mistakes – that’s part of the fun!

Pro Tips for Stunning Disc Dyeing Results
Now that you have the basics down, here are some pro tips to help you achieve stunning disc dyeing results:
- Start with Lighter Colors: If you’re a newbie to disc dyeing, it’s best to start with lighter colors like yellow or pink. These colors tend to show up better on discs and are less likely to bleed or mix into a muddy mess.
- Use Stencils for Clean Lines: Stencils can be your best friend when it comes to creating clean and precise designs. You can use pre-made stencils or create your own by cutting out designs from plastic sheets or using adhesive vinyl. Place the stencil on the disc and use a plastic squeeze bottle or dropper to apply the dye.
- Experiment with Shaving Cream Techniques: Shaving cream techniques are a fun and creative way to achieve unique and mesmerizing patterns on your discs. Simply spread a layer of shaving cream on the disc’s surface, apply drops of dye in different colors, and use a toothpick or skewer to swirl the colors together. Once you’re satisfied with the design, wipe off the excess shaving cream and reveal your stunning creation!
- Don’t Be Afraid to Mix Colors: One of the joys of disc dyeing is experimenting with different color combinations. Don’t be afraid to mix and blend colors to create unique and eye-catching designs. You can layer colors on top of each other, use complementary colors for contrast, or create gradients by blending different shades together. Let your imagination run wild and have fun with the process!
- Practice Patience: Disc dyeing requires patience and precision. It’s important to let the dye set on the disc for the recommended amount of time to ensure the colors penetrate the plastic properly. Rushing the process may result in uneven colors or bleeding. So, be patient, it’ll be worth the wait.
Disc Dyeing: A Creative Outlet for Disc Golfers
Disc dyeing is not only a way to create custom discs that stand out on the course, but it’s also a creative outlet for disc golfers. It allows you to express your personality and showcase your artistic skills while adding a touch of humor and wit to your discs.
Imagine the reactions from your fellow disc golfers when they see your disc with a funny meme-inspired design or a witty pun that adds an extra layer of entertainment to your game.
So, whether you’re a seasoned disc dyeing pro or a newbie looking to unleash your inner artist, disc dyeing is a fantastic way to add a personal touch to your discs and make a statement on the disc golf course.
With the right supplies, some creativity, and a bit of patience, you can create stunning custom discs that will not only make you the envy of the course but also bring a smile to your face every time you throw them.
So What Are You Waiting For?!
Disc dyeing is a fun and creative way to customize your disc golf discs and express your personality on the course. With the right tools, techniques, and a sprinkle of humor, you can create eye-catching and unique designs that will turn heads and spark conversations.
So, grab your dye, put on your artistic hat, and let your creativity flow – who knows, you might just become the Picasso of the disc golf world! Happy dyeing, fellow disc golfers!